Building light into the plan: skylights for renovations and extensions in NZ homes
Across New Zealand, many renovations and extensions begin with the same wish list: more space, better connection to the outdoors, and a home that feels lighter and easier to live in.
Walls are moved, new openings are cut and decks are added. Somewhere in the conversation, a line appears on a sketch:
“We’ll add some skylights here for extra light.”
Then budgets tighten, details multiply and that simple line risks becoming an afterthought, squeezed into whatever ceiling space is left.
This article looks at skylights for renovations and extensions in NZ homes – how to plan them early, so they support layout, structure and comfort rather than being “nice to have” items added late in the process.
1. Why skylights belong in the early planning, not the last minute
Skylights are most effective when considered alongside the big decisions, not after walls and roofs are locked in.
Light shapes how new spaces feel
In a renovation or extension, you are not only adding square metres. You are shaping:
- how far daylight reaches into the plan
- whether new rooms feel open or tunnel‑like
- how spaces connect from morning to evening.
Skylights can help pull light into the middle of a deeper plan, especially when new rooms stretch further into the site than the original house.
Structure and services need coordination
Roof structure, plumbing, ventilation ducts and wiring all compete for space in ceilings.
Planning skylights early allows:
- rafters or trusses to be set out with openings in mind
- services to be routed around skylight shafts instead of across them
- shafts to be integrated neatly into walls and bulkheads.
Budget and sequencing are easier to manage
When skylights are part of the main scope from the start, it is easier to:
- include them in pricing and programme
- share scaffold and roof access with other trades
- avoid expensive changes once lining is already up.
2. Common NZ renovation patterns and their daylight challenges
Different renovation types tend to create different light issues.
Rear kitchen–living extensions
A very common pattern across Auckland, Wellington and other centres is:
- original rooms retained at the front
- a new open‑plan kitchen, dining and living zone added at the rear
- large sliders or bifolds opening to a deck or garden.
Challenges can include:
- deep internal kitchen areas that feel dull compared with the glazing at the rear
- strong glare lines near the deck while the middle of the room feels flat
- central parts of the plan being heavily dependent on artificial light.
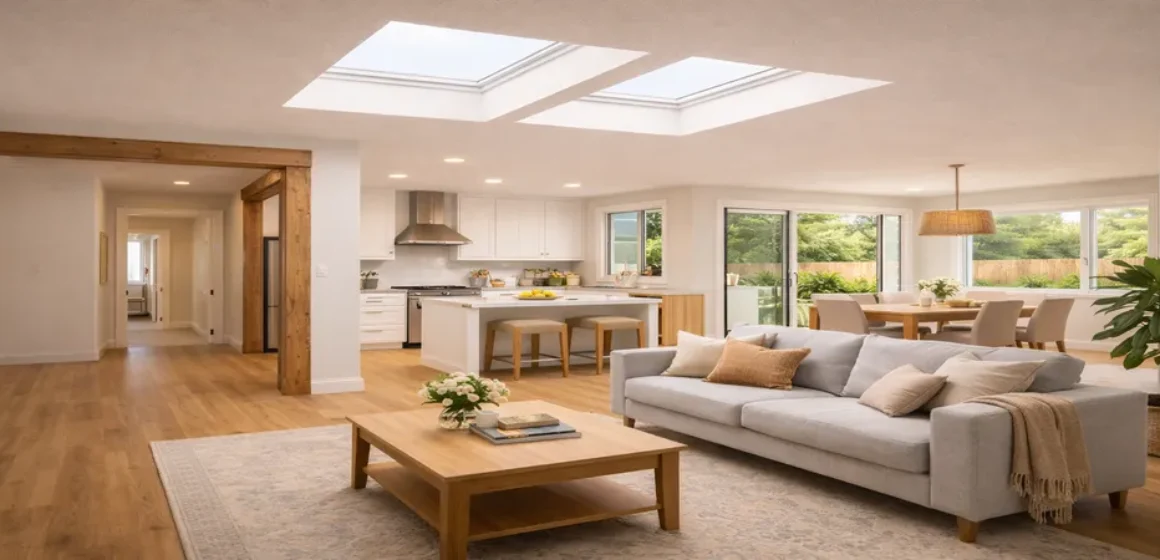
Skylights over internal benches, islands or circulation zones can help balance this contrast.
Second‑storey additions
Adding an upper level can:
- shade parts of the ground floor that were previously bright
- create new internal hallways and landings
- move bedrooms and living areas into roof spaces.
Here, skylights can:
- bring daylight into upper‑level halls and stairs
- provide sky views where side windows are constrained by neighbours
- help ground‑floor rooms retain a sense of light after the addition.
Reconfigured interiors within an existing shell
Sometimes the roof stays, but the layout changes significantly:
- bedrooms become bathrooms
- internal rooms become studies
- walls shift to create open‑plan zones.
In these cases, existing windows may no longer sit in the right places for the new uses. Skylights can be used to support the new layout without cutting entirely new wall openings.
3. Deciding what each skylight is actually for
Before drawing boxes on a plan, it helps to decide the job each skylight should do.
Task support vs general brightness
Ask in each room:
- “Do we need focused light on a task area?” (bench, island, reading chair)
- “Do we need to lift overall background brightness?” (internal living zone, hall).
Task‑focused skylights may sit directly above a bench or table. General brightness skylights often sit in the centre of the room or over circulation routes.
View vs diffuse glow
Some spaces benefit from a direct view of the sky. Others just need a soft wash of light.
Consider:
- roof windows or larger skylights where seeing clouds adds to the room
- tubular or diffused units in bathrooms, corridors and service spaces
- whether the room will be used for early mornings, late nights or both.
Ventilation vs fixed units
Decide where you need:
- extra ventilation to release warm or moist air
- fixed, well‑insulated units where airflow is already managed by windows or mechanical systems.
Being clear about these roles keeps skylight decisions grounded and reduces the chance of over‑ or under‑specifying.
4. Integrating skylights into structural and thermal performance
Renovations and extensions are a chance to lift performance as well as appearance.
Working with engineers and designers
When structural input is needed, it should cover:
- how openings in existing or new roof framing will be supported
- any load paths affected by skylight locations
- coordination between skylights and elements like ridge beams, purlins and bracing.
Early dialogue between designers, engineers and installers reduces surprises on site.
Aligning with insulation and heating upgrades
In many NZ renovations, owners are also:
- upgrading ceiling and wall insulation
- adding or improving heat pumps, radiators or underfloor heating
- tightening up doors and windows to reduce drafts.
Skylights should be specified to match this improved envelope, using:
- appropriate glazing and coatings for the region
- insulated shafts
- careful air‑sealing around openings.
Managing moisture in new layouts
New bathrooms, laundries and kitchens bring new moisture loads.
Skylights in these spaces must sit inside a broader strategy that includes:
- extraction fans sized for the room
- adequate make‑up air
- heating that keeps surfaces above dew point where practical.
Vented skylights can support this, but should not be the only moisture control element.
5. Avoiding common skylight regrets in renovated homes
When skylights are added late or without a clear brief, a few recurring issues appear.
Bright patches with dark surroundings
A single large skylight dropped into a complex space can create:
- a bright circle of light on the floor
- surrounding areas that still feel dull
- glare when you move through the contrast.
Sometimes, two or three smaller, well‑placed units provide a more comfortable result.
Glare over dining tables and sofas
In open‑plan rooms, placing skylights directly above:
- a dining table
- a main sofa
- a TV zone
can result in harsh light at certain times of day. Better placement often involves shifting skylights slightly so light washes walls and ceilings, with blinds for fine control.
Overlooking privacy in new layouts
Reconfigured bathrooms or bedrooms can end up closer to neighbours than before.
Skylights can help protect privacy, but their locations should still consider:
- neighbouring upper windows
- potential overlooking from taller buildings
- whether diffused glazing is more appropriate than clear.
6. Planning path – bringing skylights into your renovation brief
A structured approach can help keep skylights integrated with the wider project.
Step 1 – List your renovation goals in plain language
Note what you want to change: darker kitchen, gloomy hall, closed‑in living area, limited winter light.
Step 2 – Map existing and proposed light sources
On your plans, mark all current and proposed windows, doors and openings. Highlight areas that still feel under‑lit.
Step 3 – Identify priority zones for skylights
Choose a small number of areas where added daylight will change daily use – for example, an internal kitchen bench, a new stair or a central hall.
Step 4 – Discuss skylights early with your designer and builder
Bring skylights into layout discussions, not just finishing talks. Ask how they interact with structure, services and roof design.
Step 5 – Prepare a focused brief for an installer
Include your region, plans, elevations, roof photos and a short note on what you want each skylight to achieve.
Skylights New Zealand can connect you with installers and partners who are used to working alongside architects and builders on NZ renovation and extension projects.
Make an enquiry via Skylights New Zealand
With skylights planned from the beginning, your renovation or extension is more likely to feel naturally bright and comfortable, rather than relying on last‑minute fixes.
FAQs – skylights for renovations and extensions in NZ
Q1. Should I decide on skylights before or after getting renovation plans drawn?
It helps to raise skylights early, even at the first concept stage. Final locations can be refined as plans develop, but early discussion ensures structure and services are coordinated.
Q2. Are skylights more complex to add in a renovation than in a new build?
They can be, because existing structure and roof conditions need to be understood. However, experienced installers and designers work with renovations regularly and can usually find practical solutions.
Q3. Will skylights blow out my renovation budget?
Skylights add cost, but planning them from the start often avoids more expensive changes later. Many homeowners find that a few well‑placed units provide more value than a larger number of small windows.
Q4. Is it better to use tubular or larger skylights in an extension?
It depends on the room size and purpose. Tubular skylights work well for halls, internal bathrooms and small study nooks. Larger units suit open‑plan living, kitchens and stairwells where a stronger daylight presence is needed.
Q5. How do skylights affect building consent for my renovation?
In many NZ projects, skylights are part of the overall building consent package. Your designer or installer can advise how specific products and details will be documented and what councils typically expect.
Q6. Can I retrofit skylights into a recent extension that feels too dark?
Often yes, although it may involve additional work to access the roof and adjust structure. A site visit will help an installer assess what is practical and how to integrate new skylights with the existing build.