Light first, floor plan second: rethinking renovations with skylights in mind
The drawings looked perfect on paper. The new kitchen is bigger, the island is where you always imagined it, and the stacker doors open to the deck. But on a midwinter afternoon in Auckland or Wellington, something feels off. The back of the bench is still in shadow. You are switching lights on earlier than you expected.
Most renovation plans start with walls, fixtures and finishes – where to move the laundry, how big the pantry will be, whether to choose stone or laminate. Daylight is often treated as a background extra that will somehow take care of itself.
In reality, the way light moves through your home will influence how it feels long after you have forgotten the colour of your tapware. Skylights are one of the most powerful tools for reshaping that light, yet they are rarely given a seat at the table early enough.
This article is about flipping that order for New Zealand homes:
- putting light first when you plan a renovation
- using skylights to unlock spaces that windows alone cannot reach
- avoiding common layout decisions that fight against daylight.
Illustrative Example Only: “We spent weeks choosing kitchen finishes and about ten minutes talking about light. Once everything was in, we realised the prettiest part of the room was also the darkest. Adding a skylight above the bench changed how we used the space more than any other choice.”
Our aim is not to sell you a particular product, but to help you see skylights and daylight as core design elements, not last-minute extras.
1. Why light deserves a place at the planning table
When people describe homes they love, they rarely start with square metres or storage. They say things like:
- “It’s so light in the mornings.”
- “The living room feels open, even on grey days.”
- “You don’t need to turn the lights on until late.”
These comments are all about daylight, not decor.
In a renovation, skylights can:
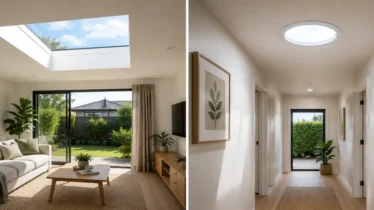
- bring light into internal or south-facing rooms that never quite feel bright
- balance spaces where one side has big glazing and the other feels heavy
- change how you move through the house, making hallways and transitions feel calm rather than cave-like.
If you leave skylight decisions until after the floor plan is “locked in”, you may end up:
- trying to squeeze light into awkward corners
- discovering that new overhead beams or services limit placement
- missing opportunities to align skylights with key zones like kitchen islands, dining tables or stair landings.
Putting light first helps ensure the rest of the design supports it instead of blocking it.
2. Common renovation mistakes that work against daylight
Looking at renovation projects across New Zealand, a few patterns show up again and again.
Extending without thinking about depth
Adding on to the back of a house can create deep floor plans. The front rooms end up far from any external walls, while the new rear glazing shines light mostly on the outer edge.
Without skylights or internal light sources, central spaces can become permanently dim, especially in winter.
Relying on one big slider to do all the work
Large stacker doors or bifolds are often expected to carry the entire lighting load. They are great for views and indoor–outdoor flow, but:
- they mainly light surfaces directly in front of them
- glare can be an issue at certain times of day
- they do little for central corridors, rear benches or internal bathrooms.
Losing existing high-level light
Sometimes a renovation removes small high windows or older skylights to simplify the build. If no new overhead light is planned, the space can feel flatter afterwards, even if it looks cleaner on a plan.
Noticing these traps early gives you room to design around them.
3. A simple framework: map the light, then draw the walls
You do not need to be an architect to think like one when it comes to daylight. A simple three-step exercise can help.
Step 1: Watch the light for a few days
Before you finalise plans, spend time noticing:
- which rooms feel best in the morning, midday and late afternoon
- where you naturally gravitate to have a coffee, read or take a call
- which areas feel “dead” or flat, even when it is bright outside.
Do this on both a sunny day and a cloudy day if you can. New Zealand’s light is changeable; your renovation should work in both modes.
Step 2: Sketch your current light paths
On a simple floor plan sketch:
- mark arrows where light currently enters (windows, doors, any existing skylights)
- shade the zones that feel consistently dim.
You will often see a clear gap between where light is arriving and where you actually spend time.
Step 3: Add potential skylights as light sources, not just holes
Now, imagine skylights as additional light sources you can place with intent:
- one above a kitchen island that never sees side light
- one over the centre of a long hallway
- one above a stairwell that currently feels heavy.
The goal is to create a more even pattern: fewer bright “hot spots” next to windows, more balanced daylight across the areas you use most.
This simple framework gives you and your designer a shared language to talk about skylights early, rather than as a last-minute adjustment.
4. Working with different NZ home styles
Renovations look very different in a Grey Lynn villa compared with a 1990s Christchurch brick home or a new build in Tauranga. Skylight thinking should adapt to each.
Villas and bungalows
- Long, central hallways and closed-off rooms can be transformed by carefully placed skylights.
- A single shaft of light in a hallway can change how every adjoining room feels when you open the door.
- Attention to rooflines and heritage character is important, but overhead light can often be added with discreet detailing.
1970s–1990s homes
- Many have low or standard ceilings and internal rooms that are hard to brighten with windows alone.
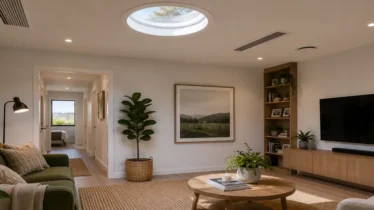
- Kitchens and living rooms are sometimes tucked under low-slung roofs that suit compact skylights or sun tunnels.
- Thoughtful skylight placement can update the feel of these homes without changing their basic structure.
Newer builds and open-plan layouts
- Large open spaces can still have “dead zones” – often in the centre of the plan.
- Skylights can deliberately highlight key zones like a dining table or study nook.
- In sunny regions like Hawke’s Bay or Nelson, glazing and shading choices help manage heat and glare while keeping the space bright.
Across all styles, the question is the same: what does this room need from the light for people to actually enjoy being in it?
5. Using skylights to define zones in open-plan spaces
Open-plan living is popular across New Zealand, but large undivided spaces can sometimes feel shapeless. Skylights offer a subtle way to define zones without walls.
Consider how skylights can:
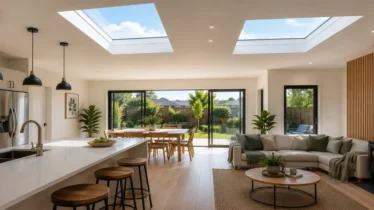
- create a natural “centre” over a dining table, making it feel like a distinct space
- highlight a reading corner or window seat in a family room
- give a home office nook enough light to feel separate from the rest of the living area.
Because skylights deliver light from above, they do this without blocking views or adding clutter. When planned early, they can be aligned with furniture, flooring changes or ceiling details for a cohesive feel.
6. Conversations to have with your designer and installer
To keep skylights central in your renovation planning, bring them into discussions from the first draft of the floor plan.
Questions to ask your designer
- Where will the darkest part of this new layout be in winter?
- Could overhead light make that area more usable or welcoming?
- How do the proposed beams, services and rooflines affect skylight placement?
Questions to ask a skylight installer
- Which parts of this plan are hardest to reach with windows alone?
- How do local climate and roof type influence product choice?
- What are the best options for balancing light, heat and ventilation in this layout?
Sharing even a rough light sketch (from the framework above) can help both professionals offer more precise advice.
7. A practical sequence for light-first renovations
If you are planning a renovation and want to put skylights and daylight where they belong – near the top of the list – a simple sequence can help:
- Define how you want the home to feel: Bright mornings? Softer afternoon light? Less reliance on artificial lighting?
- Observe your current home honestly: Which spaces never quite feel right, even in good weather?
- Sketch light paths before finalising walls: Mark existing and potential skylight positions as part of the early layout.
- Involve a skylight installer early: Ask them to review the roof plan and suggest feasible positions and product types.
- Refine the plan with light in mind: Adjust wall positions, furniture layouts and even ceiling details to support the daylight pattern you want.
- Choose finishes that respect the light: Lighter benchtops, reflective splashbacks or pale corridor walls can help skylight light travel further.
This way, skylights become part of the architecture of the renovation, not an afterthought squeezed into leftover space.
8. Next steps – bringing light into the first conversation
If you are at the start of a renovation journey, you do not need all the answers yet. What matters most is that daylight – and skylights – are part of the first round of thinking, not the final checklist.
Start by:
- noticing where your current home feels best and where it feels dull
- imagining how overhead light could support the way you actually live
- talking to both your designer and a skylight installer while plans are still flexible.
Skylights.co.nz can help you connect with experienced installers across New Zealand who understand how to work with different house styles, climates and renovation budgets.
Make an enquiry via Skylights.co.nz
A brief outline of your renovation goals and a copy of your draft plans are often enough for an installer to start suggesting practical options.
FAQs – skylights and home renovations in NZ
Q1. Should I decide on skylights before or after finalising my renovation plans?
Ideally, skylights should be discussed while the floor plan is still flexible. Early planning helps avoid structural clashes and ensures daylight is considered alongside room layouts, not after everything else is set.
Q2. Can skylights be added to any renovation, or are there roof types that do not suit them?
Most common NZ roof types – metal, concrete tile, some membrane roofs – can work with skylights when detailed correctly. The key is matching the product and flashing system to the roof construction and engaging an experienced installer.
Q3. Will adding skylights make my renovated home too hot in summer?
Not if they are specified carefully. Glazing choice, shaft design, orientation and the use of blinds or diffusers all play a role. Your installer can suggest options that balance winter light with summer comfort for your region.
Q4. Are skylights only worth considering for big open-plan renovations?
No. Smaller, targeted additions – such as a skylight over a dark hallway, stairwell or bathroom – can significantly change how a home feels, even if the renovation itself is modest.
Q5. Do I talk to my builder or a skylight specialist first?
You can speak with either, but involving a skylight installer early often leads to better outcomes. They can work with your designer or builder to confirm what is feasible before details are locked in.
Q6. How do skylights affect building consent for renovations?
In many cases, skylights form part of a broader consented renovation design. Your designer or architect will usually handle consent requirements, while your installer ensures the product and detailing meet the relevant performance expectations. If you are unsure, ask both parties how skylights are being covered in the documentation.