Where roof and skylight meet: flashings and NZ roofs explained
When people picture a skylight, they usually think about the glass, the shaft or the light on the floor. Very few picture the quiet strip of metal and flashing tape that does much of the work when the weather turns.
Yet in New Zealand’s mix of rain, wind and coastal conditions, that junction between skylight and roof is where performance is either made or lost.
A typical story looks like this:
- the skylight itself looks fine from inside
- light is good, the room feels better
- then, months or years later, a faint stain appears on the ceiling near the skylight.
You may hear comments like:
“The skylight must be leaking.”
In reality, the glass and frame are often sound. The issue is usually around them, where roofing and skylight flashing meet.
This article is a plain‑English guide to skylight flashing on NZ roofs – what flashings actually do, how they change with different roof types, what “good” looks like in practice, and the questions you can ask your installer or roofer, without needing to become a builder yourself.
1. What flashings actually do – in plain language
You do not need to know every technical term, but a few simple ideas help everything else make sense.
Working with water and gravity
Roofs leak when water finds a way to:
- run sideways into a gap
- get pushed uphill by strong wind
- sit in a shallow dip until it finds a weakness.
Flashings are shaped pieces of metal (and sometimes flexible membranes) that:
- guide water around an opening
- cover joints where two surfaces meet
- give water an easier path away from the skylight.
You can think of them as little roof gutters and umbrellas combined, pressed tightly against the skylight and roof.
Covering all four sides of the opening
A skylight opening has four main edges:
- the lower edge, where water wants to run past
- two sides, where wind can push water sideways
- the top edge, where water arrives from above.
Good flashing work thinks about all four sides together. If one side is weak, water will find it over time.
Moving with the roof, not fighting it
Roofing moves a little with heat, cold and wind. Flashings are designed to:
- overlap the roofing in ways that still work when things shift slightly
- allow for sealants to age and be renewed
- keep relying on shape and overlap rather than glue alone.
This is why good detailing focuses on layers and laps, not just on “sealing every gap with product”.
2. How skylights and NZ roofs “talk” to each other
Skylight flashings are not one‑size‑fits‑all. They are designed to suit metal, tile and membrane roofs differently.
Imagine three annotated photos on a page. We will walk through what you would see in each.
A. Longrun metal roof – the folded channels
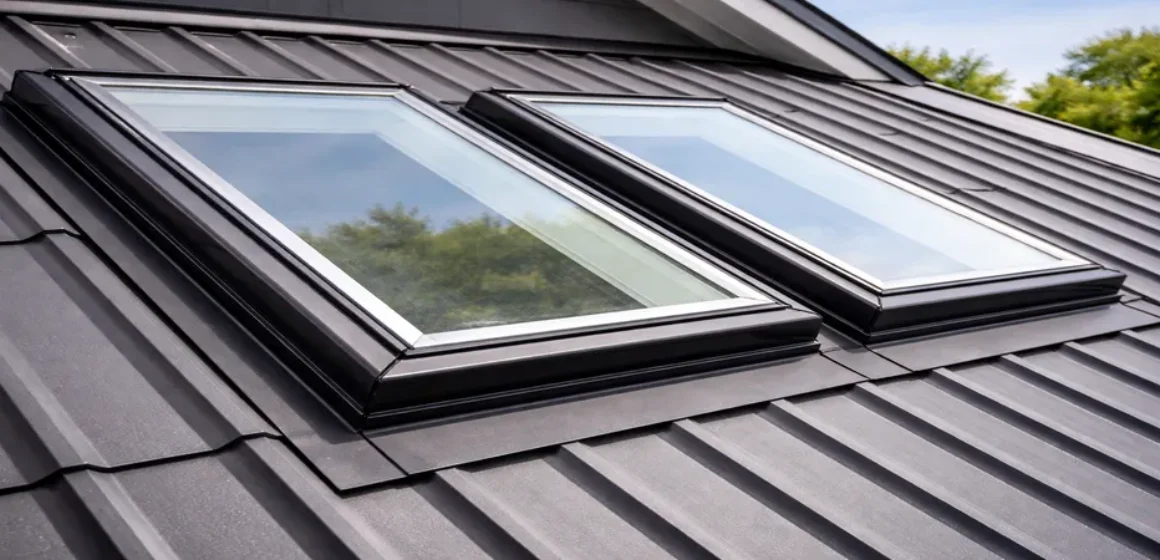
On a longrun metal roof (very common across NZ):
- roofing runs in long sheets with raised ribs
- water runs down the ribs towards the gutter
- the skylight sits across these ribs.
In an annotated side‑view photo, you would see:
- the metal roof sheets turning up slightly behind the skylight
- a head flashing tucked under roofing above the skylight, guiding water to each side
- side flashings stepping down over the ribs
- an apron flashing at the bottom, sitting over the sheets so water can run back onto the main roof.
The key idea is that water never has to jump a gap. It always has a shaped surface to follow around the skylight and back onto the main roof.
B. Tile roof – hooking into the pattern
On a concrete or clay tile roof:
- tiles overlap like scales
- there are dips and ridges in every course
- the skylight interrupts this pattern.
In an annotated overhead photo, you would see:
- tiles carefully cut and re‑laid around the skylight
- a lower apron flashing that shapes itself over the tiles and up the face of the skylight
- side flashings that step up between tile courses
- an upper back flashing that tucks under tiles above and turns up behind the skylight.
Here, the goal is to stitch the skylight into the tile pattern so water follows the same stepping path it did before the opening was created.
C. Membrane or flat roof – managing ponds and edges
On low‑slope roofs with membranes:
- surface falls may be very shallow
- water can pool easily if detailing is poor
- outlets and internal gutters often sit nearby.
In an annotated section drawing, you would see:
- the skylight curb (upstand) rising above the membrane
- membrane turned up and over the curb in a continuous layer
- metal flashings protecting the top edges of the curb
- careful shaping of the membrane so water cannot sit hard against the skylight.
Here, flashings and membrane detailing are about avoiding ponding and keeping all joins well above the main water level.
3. What “good flashing work” looks like to the naked eye
You do not need to check every nail. But there are visual clues that suggest care and competence.
Clean, deliberate lines
From outside, good skylight flashing usually shows:
- straight, tidy lines around the skylight
- flashings that sit flat against roofing and the skylight frame
- no obvious buckling or large gaps.
On metal roofs, ribs should:
- be cut cleanly where they meet flashings
- not disappear into messy, over‑filled sealant.
Overlaps, not exposed cut edges
Well‑detailed flashings show:
- roofing lapping under head flashings and over apron flashings
- side flashings lapping over roofing in a consistent way
- cut edges tucked neatly under flashings wherever possible.
If you can see many raw, exposed cut edges right next to a skylight, it is worth asking how those areas are protected.
Sealant as backup, not the main defence
Sealant is useful, but it should not carry the whole load.
From a homeowner’s point of view, this means:
- some sealant is normal at specific joints
- thick smears trying to close large gaps are a warning sign
- you should see clear overlaps and stepped paths for water.
Illustrative Example Only: A Wellington homeowner noticed their new skylight was surrounded by heavy beads of sealant on a metal roof, with little visible shaping. After a second opinion, some flashings were re‑made so water was guided around the skylight by metal, not by mastic. The ceiling stain that had been slowly growing did not return.
4. Common weak spots – and how good detailing prevents problems
Understanding weak spots can help you ask better questions, without trying to diagnose every issue yourself.
Wind‑driven rain at the top edge
On exposed sites, wind can push rain up roof sheets or tiles.
Good detailing at the top edge includes:
- an upstand or turn‑up in the roofing behind the skylight
- a head flashing that tucks well under roofing above
- thoughtful laps so water has to work hard to move uphill.
Sideways water paths and splash zones
Water does not only flow straight down. It can:
- splash sideways off ribs
- track along tile side laps
- flow across membranes where falls change direction.
Side flashings should be shaped so that these sideways paths still lead safely around the skylight.
Ponding on flat or very low‑slope roofs
On low‑slope roofs, poor detailing can create shallow ponds next to a skylight curb.
Good practice aims to:
- keep the membrane falling gently away from the skylight
- avoid placing skylights right next to internal gutters or outlets where possible
- ensure curb heights and flashings sit well above any normal water level.
5. Questions to ask your installer or roofer (without becoming a DIY expert)
You do not need to climb on the roof. But you are entitled to understand, in simple terms, how your skylight will be detailed.
Before installation
Helpful questions include:
- “What type of flashing system will you use for our roof?”
(Metal kit, tile kit, custom membrane detailing, etc.) - “Is this system designed for our roof profile and pitch?”
(Especially important for specialist metal profiles and low slopes.) - “How will you manage water coming from above the skylight?”
(Listen for talk of head flashings and turn‑ups, not just sealant.)
During design or quoting
You can also ask:
- “Can you show me a simple sketch or example photo of how the skylight will meet the roof?”
- “Are there any parts of the roof that make skylight detailing more complex?”
(Internal gutters, very low pitch, older roofing.) - “How will this be documented for building consent, if required?”
These questions do not tell the installer how to do their job. They simply invite a clear explanation.
After installation
From ground level, you might ask for:
- “Can you point out the head, side and apron flashings so I understand what I am looking at?”
- “How should I keep an eye on this area over time?”
(What to look for from inside, such as staining or changes.)
Skylights New Zealand encourages homeowners to have plain‑language conversations with installers and roofers. You do not need to know every term, but you should feel comfortable that someone has thought through how water moves around your skylight.
Make an enquiry via Skylights New Zealand
If you share your region, roof type and a few photos, an installer can usually explain which flashing approaches suit your roof, without asking you to climb a ladder or decode technical drawings.
FAQs – skylight flashings and NZ roofs
Q1. What is a skylight flashing in simple terms?
A skylight flashing is a shaped piece of metal (and sometimes flexible material) that covers and protects the junction between the skylight and the roof. It helps guide water around the opening so it can continue safely down the roof.
Q2. Do all skylights on NZ roofs need flashings?
Yes. Any opening in a roof needs some form of flashing or membrane detailing. The exact system changes with roof type – metal, tile or membrane – but the goal is always to keep water moving in the right direction.
Q3. Can I install or adjust skylight flashings myself?
Working on roofs carries safety risks, and poor detailing can cause leaks that are hard to trace. For most homes, skylight flashings should be installed or adjusted by experienced roofers or skylight installers familiar with your roof type.
Q4. How do I know if my skylight leak is from the flashing or the unit itself?
From inside, it is often hard to tell. Many leaks near skylights are related to surrounding roof and flashing details rather than the skylight frame or glass. An installer or roofer can investigate and explain the source.
Q5. Do I need new flashings if I re‑roof my home?
Often yes. When roofing is replaced, it is common to update flashings so they match the new roof profile and condition. Re‑using old flashings on a new roof can create weak points.
Q6. How often should skylight flashings be checked?
There is no single rule, but it is sensible to have roof areas – including skylights – looked at as part of any routine roof maintenance, especially in high‑wind, coastal or heavily shaded environments.